同じような Widget のまとまりを何回も使い回す場合、似たようなコードが繰り返されます。繰り返しがあっても動作はしますが、コードがわかりにくくなったり、変更が大変になったりします。そこで今回は、独自 Widget クラスを作成して使い回す方法を紹介します。
事前準備
独自 Widget クラスにする Widget を用意しましょう。
クラス化する Widget が既にある場合は、それを使えば良いです。クラス化する Widget がなければ、あらかじめ用意しておきましょう。
今回は独自 Widget クラスにする Widget の例として、下記ソースコードのグラデーションボタン(9〜28行目のElevatedButtonの部分)を用意しました。
@override
Widget build(BuildContext context) {
  return Scaffold(
    appBar: AppBar(
      title: const Text('Sample'),
    ),
    body: Container(
      alignment: Alignment.center,
      child: ElevatedButton(
        onPressed: () {
          print('pressed');
        },
        child: Ink(
          decoration: BoxDecoration(
            gradient: const LinearGradient(
                colors: [Colors.red, Colors.purple, Colors.blue,]
            ),
            borderRadius: BorderRadius.circular(4),
          ),
          child: Container(
            padding: const EdgeInsets.symmetric(vertical: 10, horizontal: 15),
            child: const Text('Gradient Button'),
          ),
        ),
        style: ElevatedButton.styleFrom(
          padding: EdgeInsets.zero,
        ),
      ),
    ),
  );
}
グラデーションボタンについては、以下の記事で詳しく紹介しています。
既存コードのクラス化
用意した Widget をクラス化します。
まず、Android Studio 画面右側の「Flutter Outline」タブを選択して Outline を表示します。
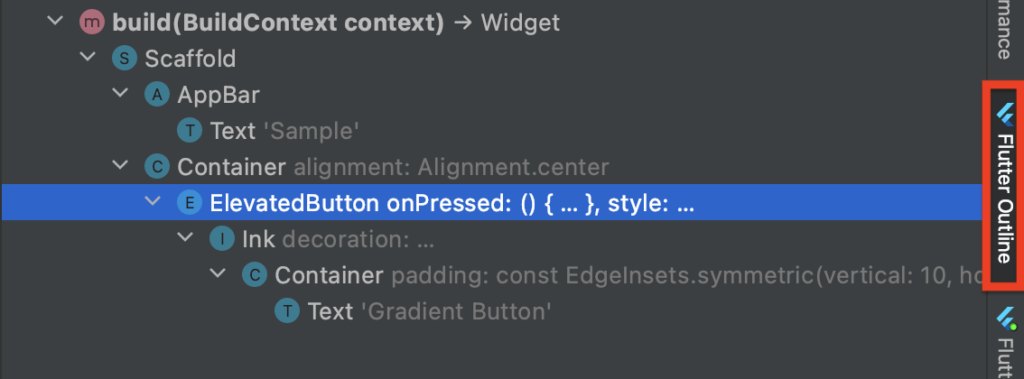
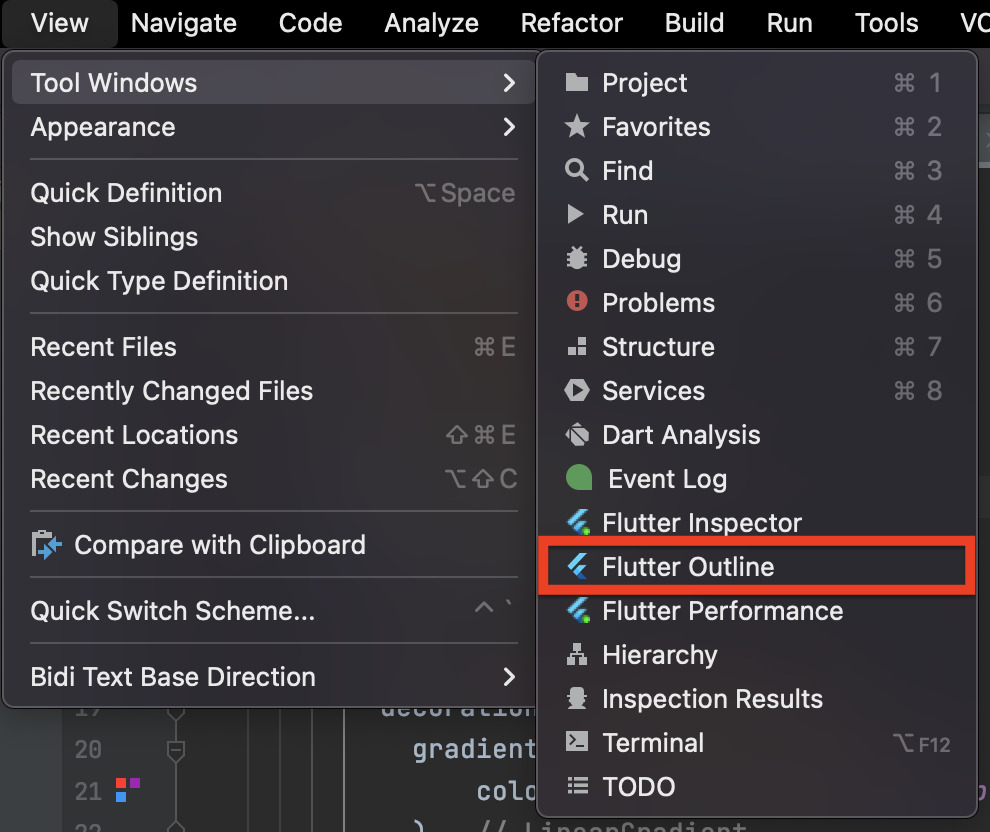
「Flutter Outline」タブがない場合は、Android Studio のメニューから、「View」>「Tool Windows」> 「Flutter Outline」を選択すると表示できます。
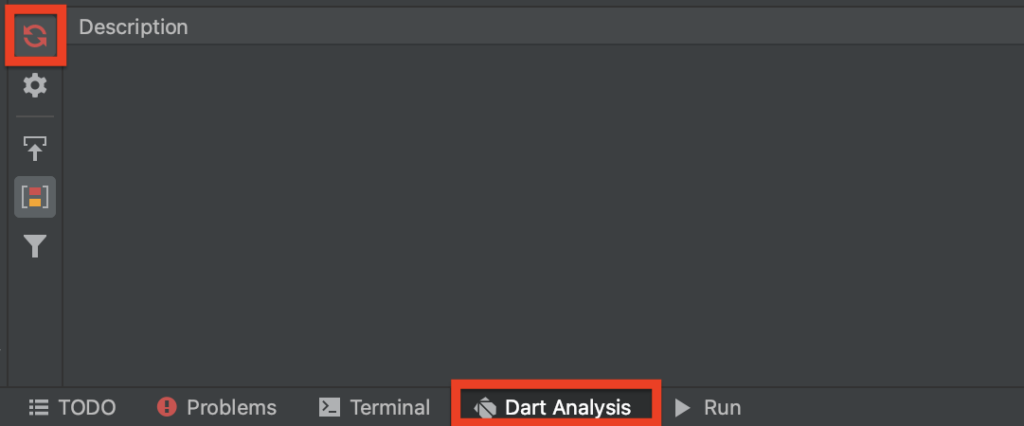
Outline に何も表示されていない場合は、一度「Flutter Outline」タブを閉じてから、Android Studio 下部の「Dart Analysis」タブを開き、左上の「Restart Dart Analysis Server」をクリックします。少し待ってから再度「Flutter Outline」を表示すると Outline が表示されます。
次に、Outline から、クラス化する Widget を右クリックして、「Extract Widget」を選択します。

クラス名を入力して「Refactor」をクリックします。

ソースコードの下部に、クラスが作成されます。
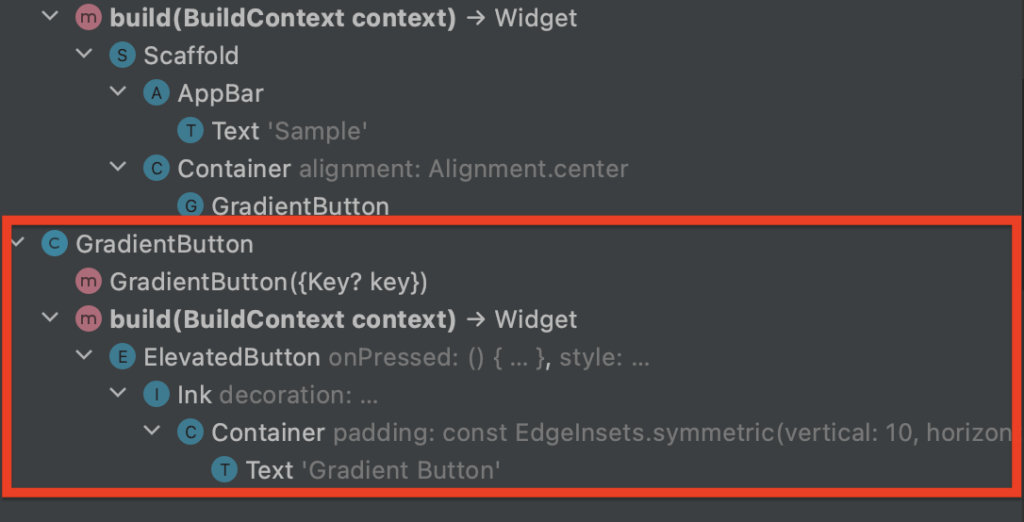
以下は、作成された GradientButton クラスのソースです。
class GradientButton extends StatelessWidget {
  const GradientButton({
    Key? key,
  }) : super(key: key);

  @override
  Widget build(BuildContext context) {
    return ElevatedButton(
      onPressed: () {
        print('pressed');
      },
      child: Ink(
        decoration: BoxDecoration(
          gradient: const LinearGradient(
              colors: [Colors.red, Colors.purple, Colors.blue,]
          ),
          borderRadius: BorderRadius.circular(4),
        ),
        child: Container(
          padding: const EdgeInsets.symmetric(vertical: 10, horizontal: 15),
          child: const Text('Gradient Button'),
        ),
      ),
      style: ElevatedButton.styleFrom(
        padding: EdgeInsets.zero,
      ),
    );
  }
}
パラメータを設定
作成したクラスを使いまわし易くするため、パラメータを設定します。
例では、GradientButton のテキスト、グラデーション、押されたときに呼ぶ関数を変更できるようにします。
プロパティを追加
まず、テキスト、グラデーション、押されたときに呼ぶ関数をプロパティとして追加します。
class GradientButton extends StatelessWidget {
  final Text text;
  final Gradient gradient;
  final Function onPressed;

  …
}
コンストラクタを用意
次に、追加したプロパティに対応するように、コンストラクタを修正します。
class GradientButton extends StatelessWidget {
  final Text text;
  final Gradient gradient;
  final Function onPressed;

  const GradientButton({
    required this.text,
    required this.gradient,
    required this.onPressed,
    Key? key,
  }) : super(key: key);

  …
}
プロパティを反映
最後に、build 関数内で、プロパティを使用します。
以下のソースコード例では、17行目、21行目、26行目でプロパティを使用しています。
class GradientButton extends StatelessWidget {
  final Text text;
  final Gradient gradient;
  final Function onPressed;

  const GradientButton({
    required this.text,
    required this.gradient,
    required this.onPressed,
    Key? key,
  }) : super(key: key);

  @override
  Widget build(BuildContext context) {
    return ElevatedButton(
      onPressed: () {
        onPressed();
      },
      child: Ink(
        decoration: BoxDecoration(
          gradient: gradient,
          borderRadius: BorderRadius.circular(4),
        ),
        child: Container(
          padding: const EdgeInsets.symmetric(vertical: 10, horizontal: 15),
          child: text,
        ),
      ),
      style: ElevatedButton.styleFrom(
        padding: EdgeInsets.zero,
      ),
    );
  }
}
これで、独自 Widget が完成です!
作成した Widget を使用
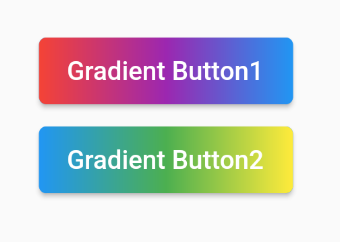
作成した 独自 Widget を使ってみたのが、以下のソースコードです。
他の Widget と同じように使用することができます。
@override
Widget build(BuildContext context) {
  return Scaffold(
    appBar: AppBar(
      title: const Text('Sample'),
    ),
    body: Container(
      alignment: Alignment.center,
      child: Column(
        mainAxisAlignment: MainAxisAlignment.center,
        children: [
          GradientButton(
            text: const Text('Gradient Button1'),
            gradient: const LinearGradient(
                colors: [Colors.red, Colors.purple, Colors.blue,]
            ),
            onPressed: () {
              print('Button1 : pressed');
            },
          ),
          GradientButton(
            text: const Text('Gradient Button2'),
            gradient: const LinearGradient(
                colors: [Colors.blue, Colors.green, Colors.yellow,]
            ),
            onPressed: () {
              print('Button2 : pressed');
            },
          ),
        ],
      ),
    )
  );
}
まとめ
Widget のクラスを自作して使い回す方法を紹介しました!
以上で、【Flutter】独自の Widget クラスを作成する方法 は終わりです。

